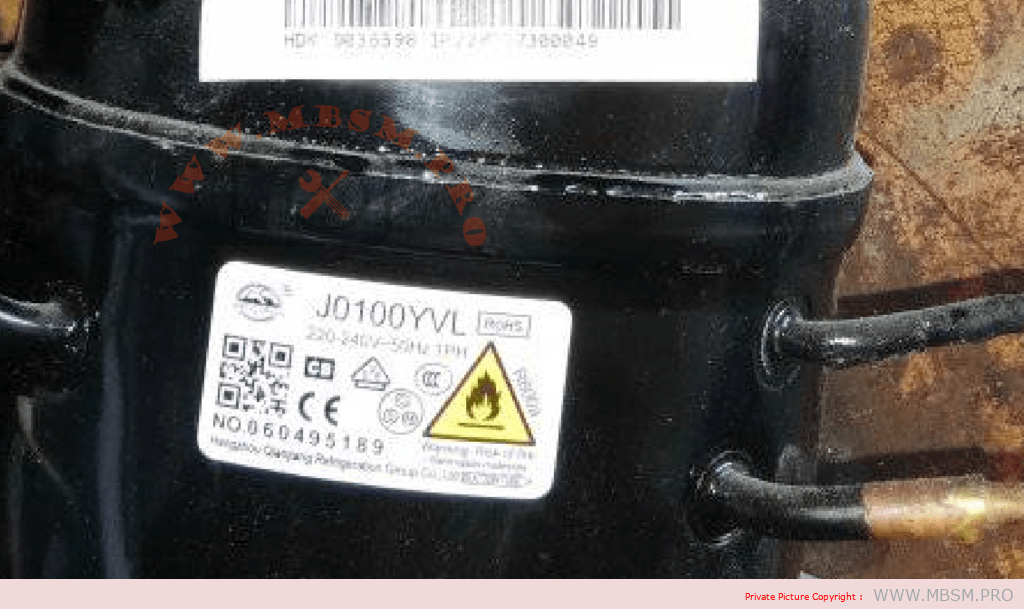
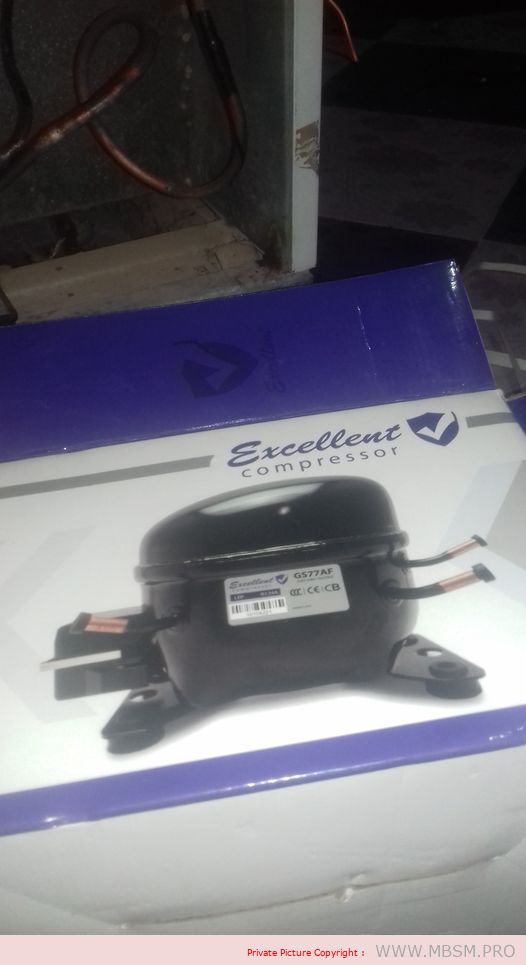
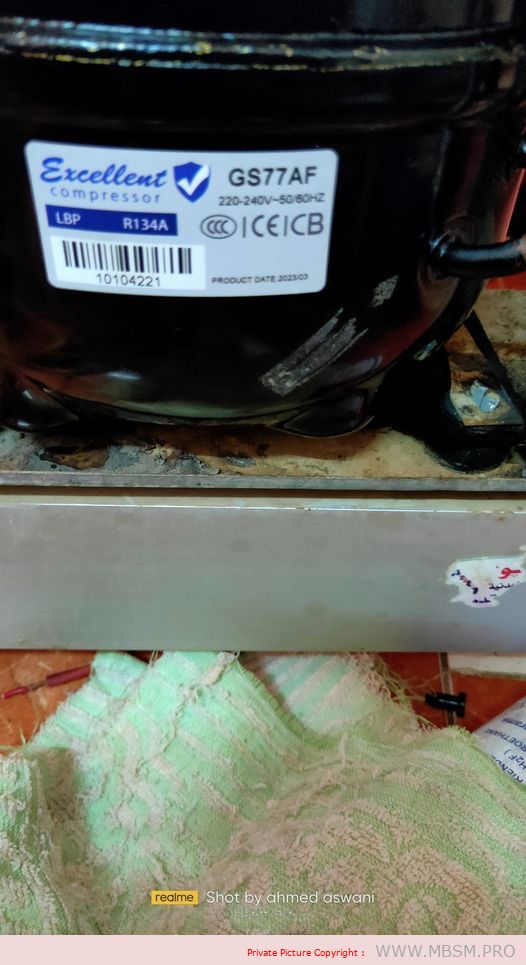
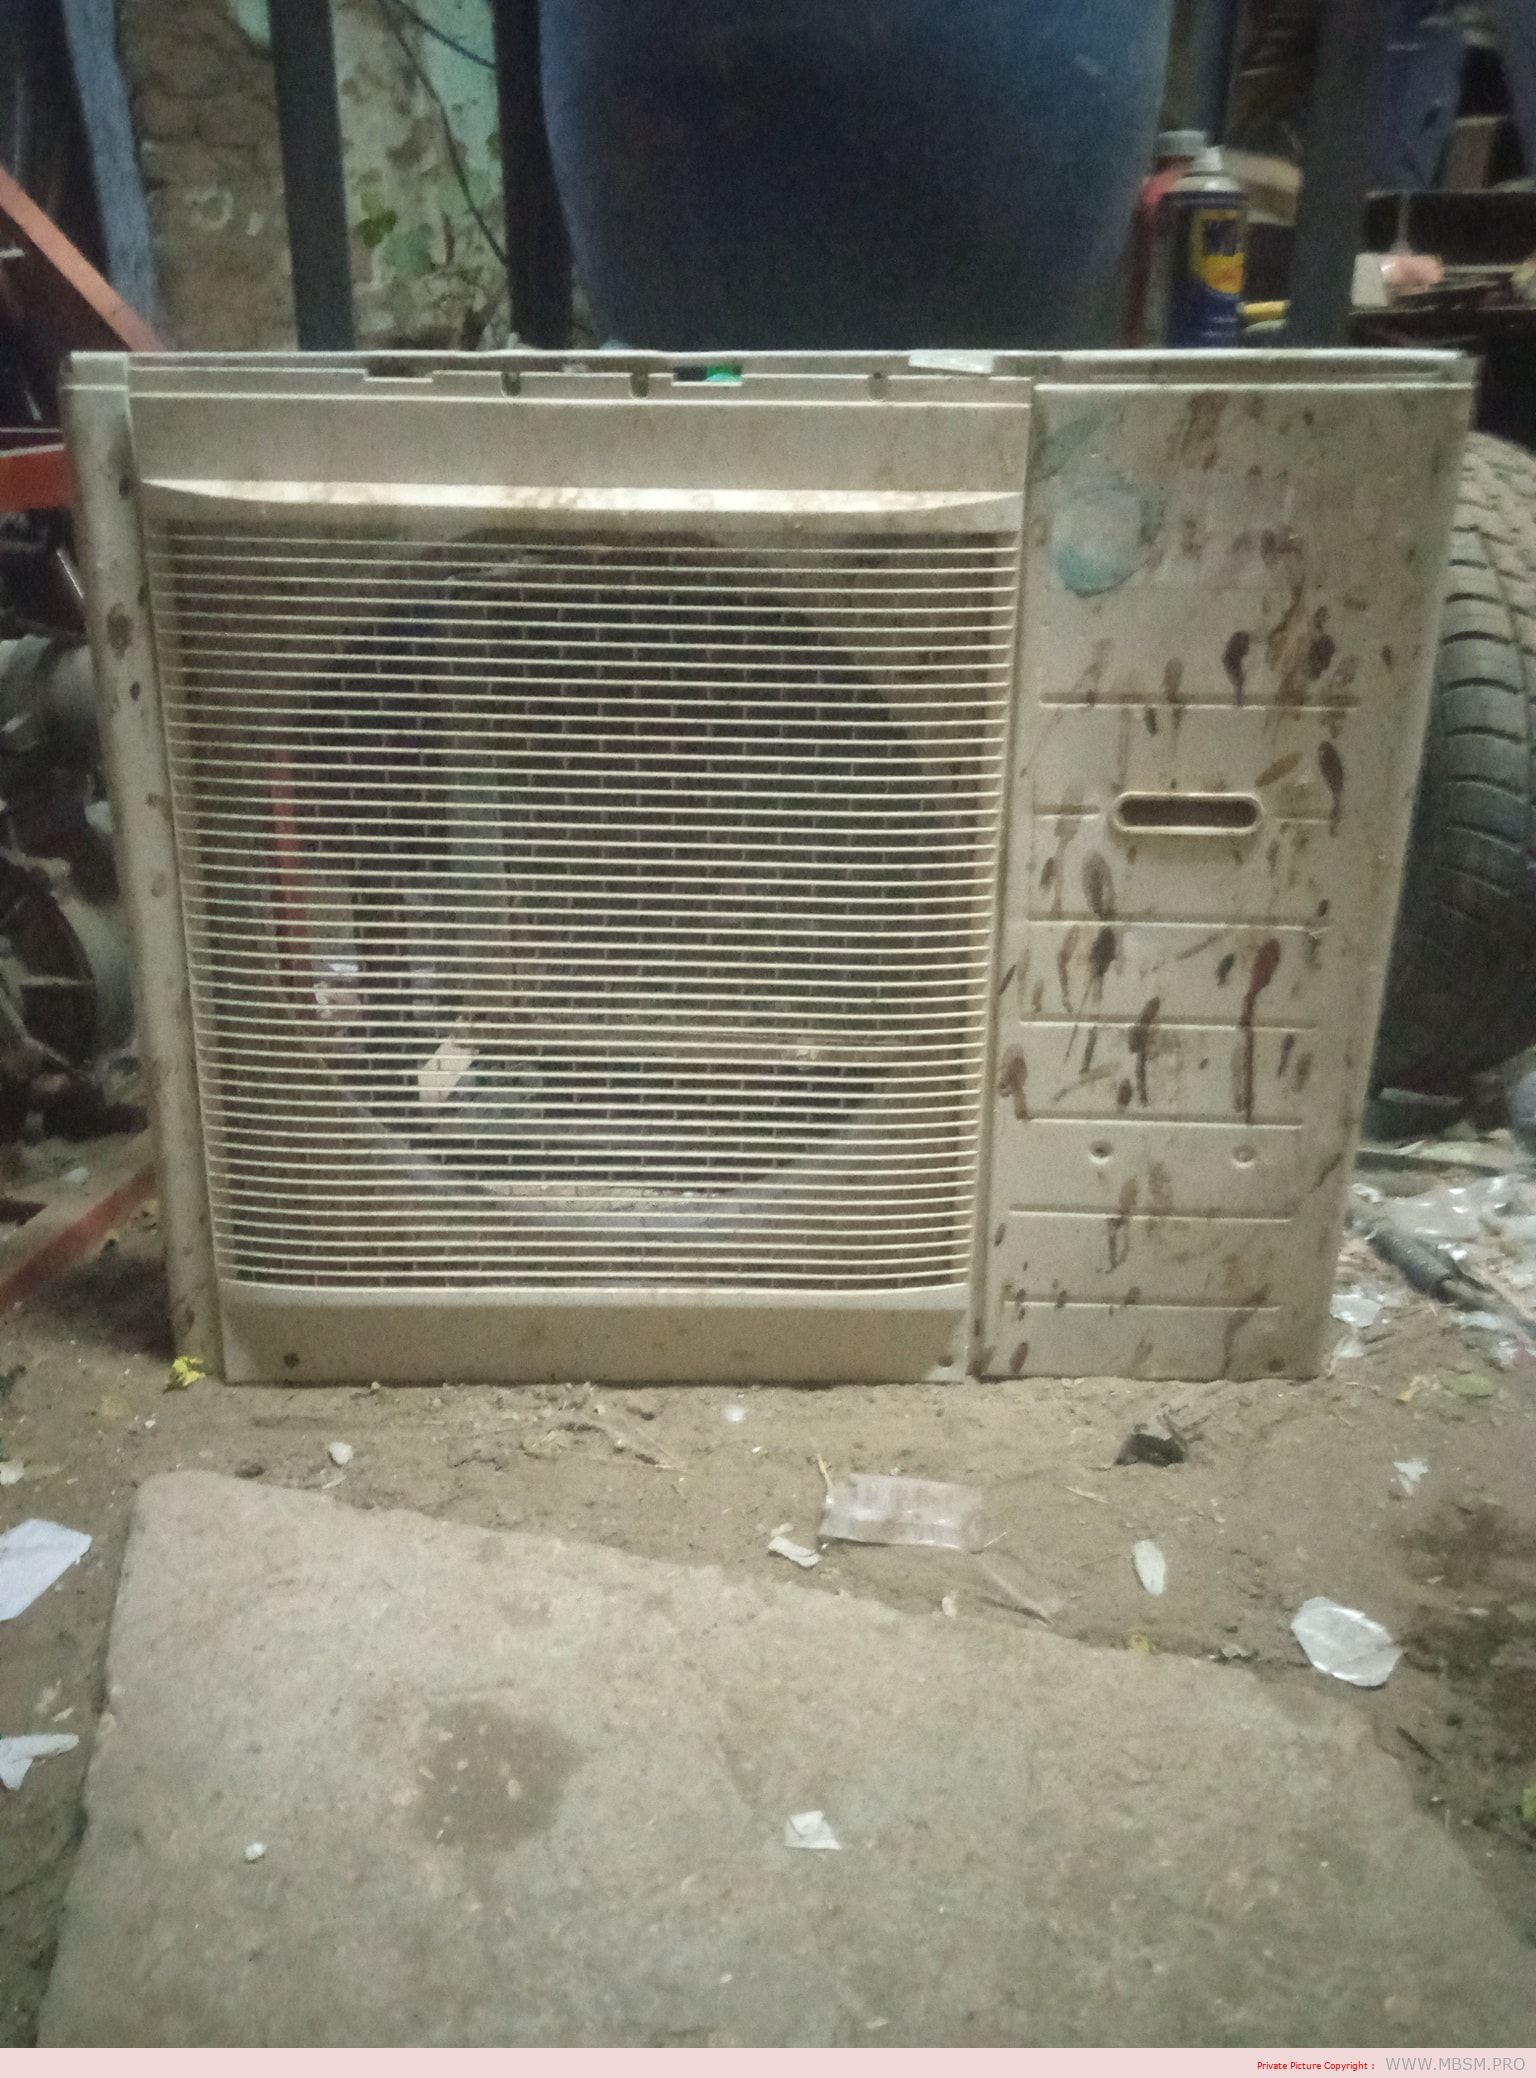
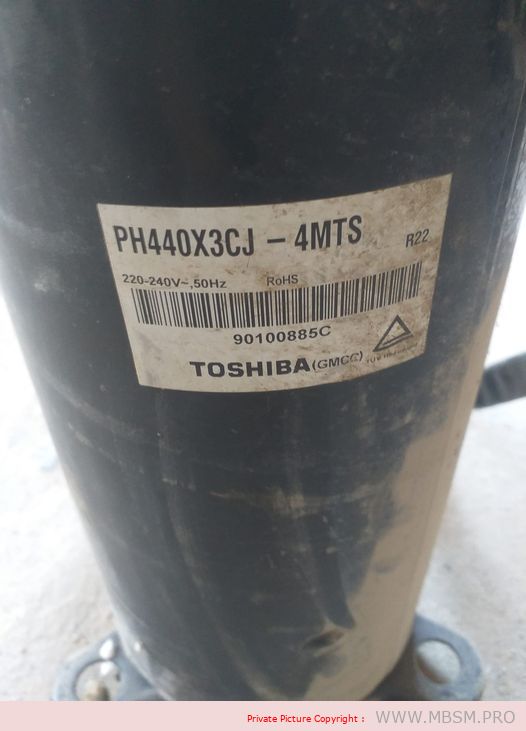
Mbsm.pro, Compressor, ph440x3cj-4mts, Rotary Compressor, 26000 Btu, R22, 3 hp, 2 Tonnes, 2500 w
Category: expertise
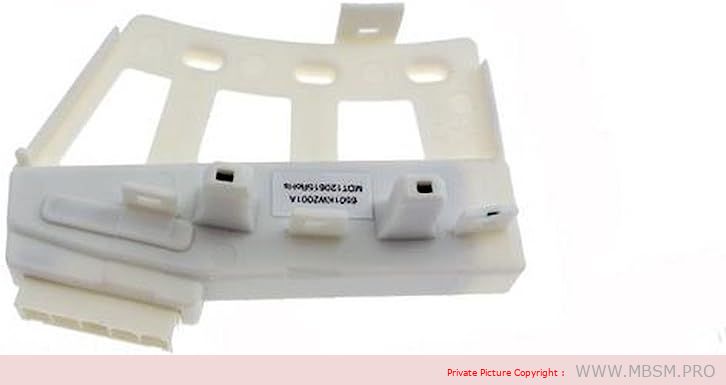
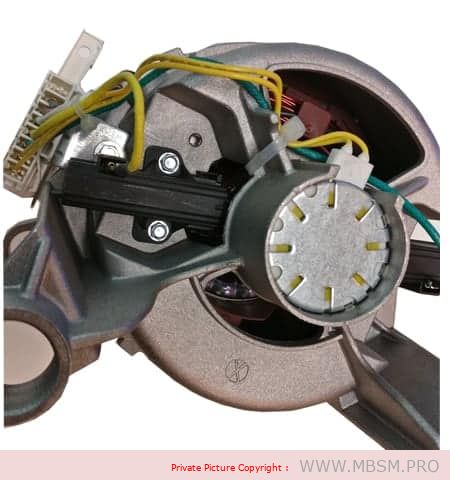
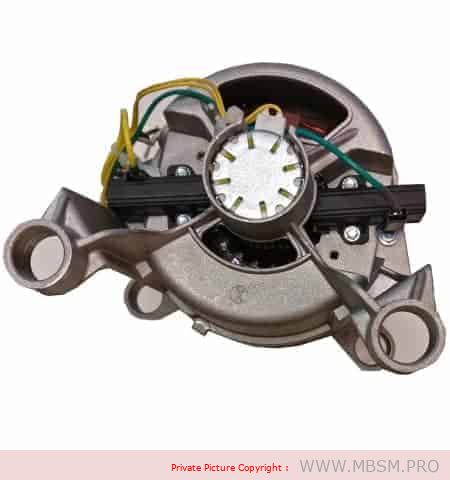
Different types of inverter compressors and universal inverter circuit boards for sale
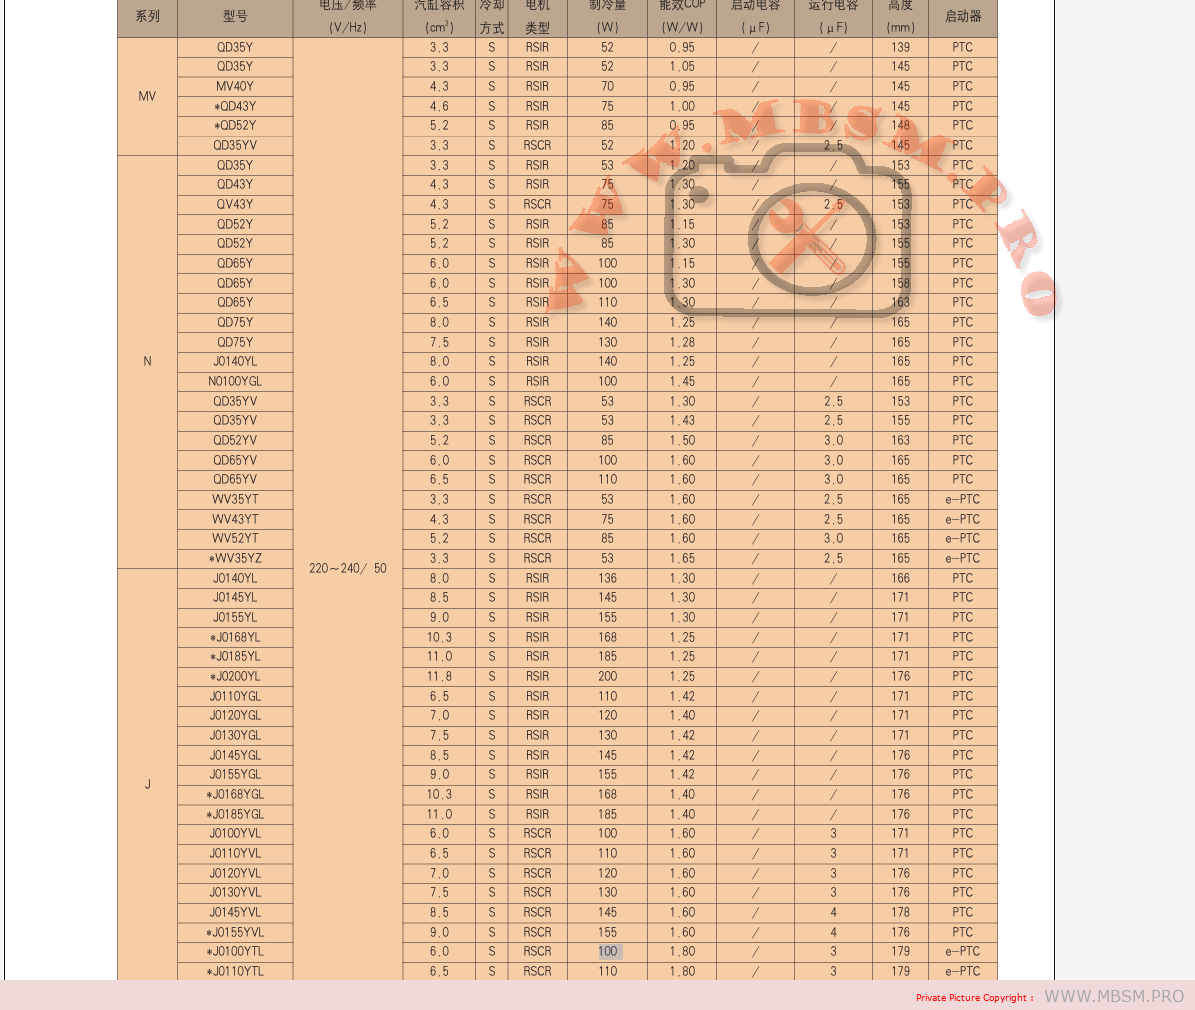
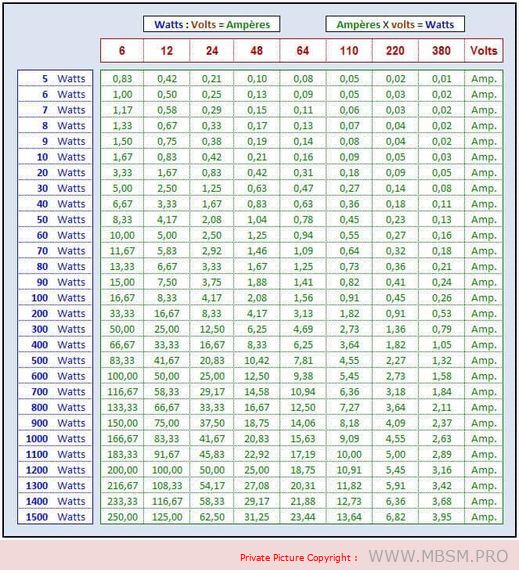
| Representative models | series | refrigerant | Power source | Displacement (cm3/rev) |
Cooling capacity (W) |
Refrigeration capacity (Btu/h) |
Power (W) |
Energy efficiency ratio (W/W) |
Capacitance (μF/V) |
Attestation |
| PH371X3CJ-3MTS | R22 | 1φ-60Hz-208/230V | 37,0 | 8000 | 27280 | 2540 | 3.15 | 55/400 | ||
| PH371X3C-3FTS1 | R22 | 1φ-60Hz-208/230V | 37,0 | 7930 | 26940 | 2520 | 3.15 | 55/400 | TUV | |
| PH331X3C-3FTS1 | R22 | 1φ-60Hz-208/230V | 32,6 | 7020 | 23870 | 2230 | 3.15 | 55/400 | TUV | |
| PH280X2CS-3KTS1 | R22 | 1φ-60Hz-208/230V | 28.1 | 5945 | 20205 | 1890 | 3.15 | 40/370 | TUV | |
| PH260X2C-3FTS1 | R22 | 1φ-60Hz-208/230V | 26.2 | 5570 | 18995 | 1770 | 3.15 | 40/370 | ||
| PH185X2C-3FTS1 | R22 | 1φ-60Hz-208/230V | 18.4 | 3915 | 13350 | 1232 | 3.18 | 35/370 | ||
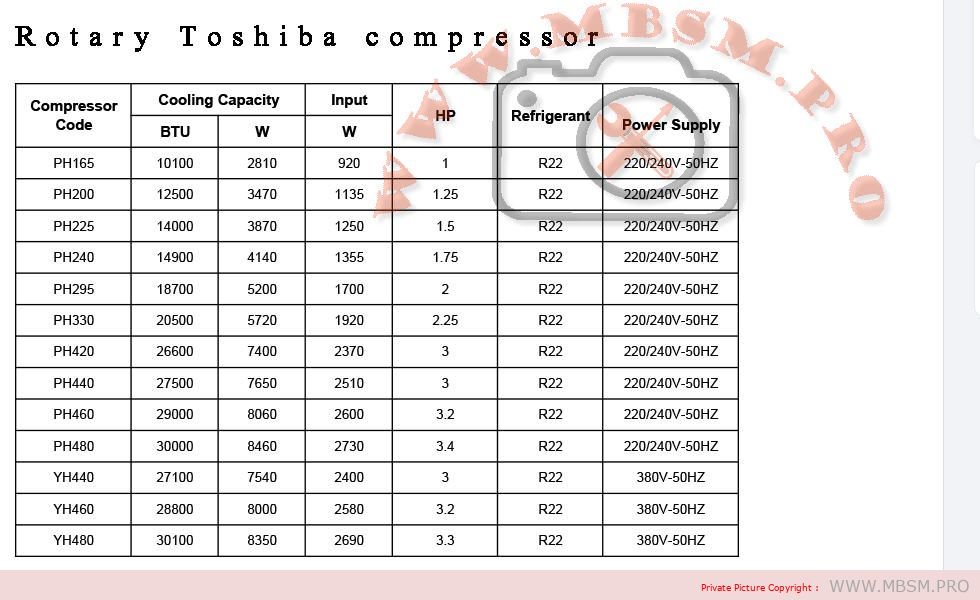
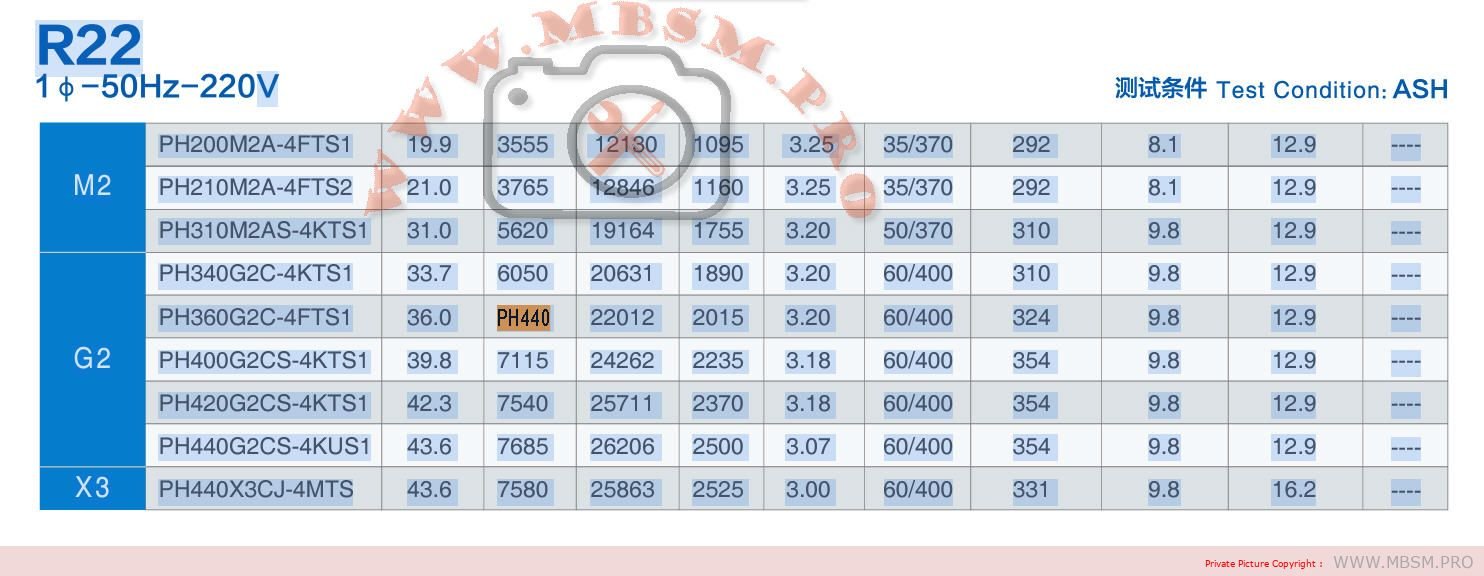
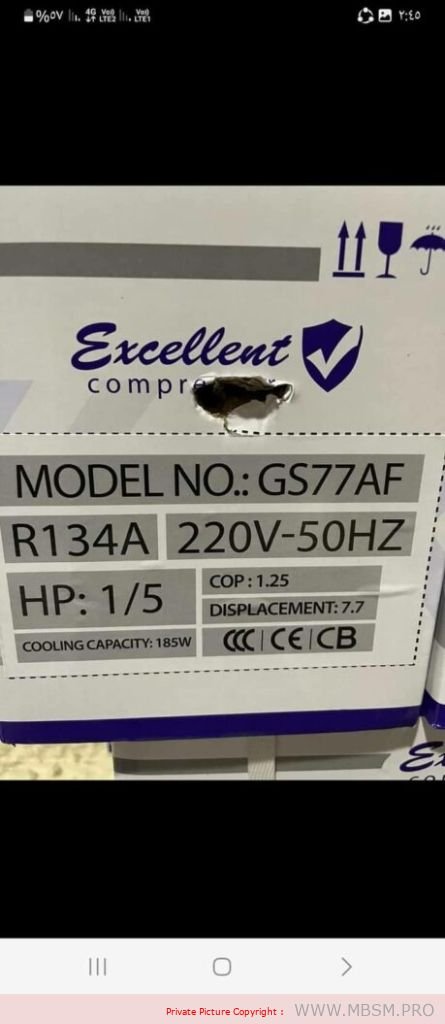
| PH440X3CJ-4MTS | R22 | 1φ-50Hz-220/240V | 43,5 | 7580 | 25850 | 2525 | 3h00 | 60/400 | TUV | |
| PH441X3CS-4KUS1 | R22 | 1φ-50Hz-220/240V | 43,5 | 7660 | 26120 | 2470 | 3.10 | 60/450 | TUV | |
| PH441X3C-4FTS1 | R22 | 1φ-50Hz-220/240V | 43,5 | 7725 | 26345 | 2495 | 3.10 | 60/450 | TUV | |
| PH421X3C-4FTS1 | R22 | 1φ-50Hz-220/240V | 42,0 | 7475 | 25490 | 2395 | 3.12 | 60/400 | TUV | |
| PH401X3CS-4KUS1 | R22 | 1φ-50Hz-220/240V | 40.2 | 7100 | 24280 | 2275 | 3.12 | 55/450 | TUV | |
| PH401X3C-4FTS1 | R22 | 1φ-50Hz-220/240V | 40.2 | 7130 | 24245 | 2300 | 3.10 | 55/450 | TUV | |
| PH361X3C-4FTS1 | R22 | 1φ-50Hz-220/240V | 35,7 | 6315 | 21535 | 2040 | 3.10 | 50/400 | TUV | |
| PH341X3C-4FTS1 | R22 | 1φ-50Hz-220/240V | 33,6 | 5970 | 20360 | 1955 | 3.05 | 50/400 | TUV | |
| PH310X2CS-4KTS1 | R22 | 1φ-50Hz-220/240V | 30,8 | 5355 | 18315 | 1715 | 3.12 | 50/370 | TUV | |
| PH310X2C-4FTS1 | R22 | 1φ-50Hz-220/240V | 30,8 | 5355 | 18260 | 1715 | 3.12 | 50/370 | TUV | |
| PH210X2C-4FTS1 | R22 | 1φ-50Hz-220/240V | 20,8 | 3660 | 12480 | 1150 | 3.18 | 35/370 | ||
| YH480X3CS-4MUC1 | X3 | R22 | 3φ-50Hz-380V | 47,9 | 8350 | 28475 | 2690 | 3.10 | / | CCC, TUV |
| YH460X3CS-4MUC1 | X3 | R22 | 3φ-50Hz-380V | 45,9 | 8000 | 27280 | 2580 | 3.10 | / | CCC, TUV |
| YH441X3CS-4MUC | X3 | R22 | 3φ-50Hz-380V | 43,5 | 7650 | 26090 | 2355 | 3.25 | / | CCC |
| YH440X3CS-4KUC1 | X3 | R22 | 3φ-50Hz-380V | 43,5 | 7455 | 25440 | 2405 | 3.10 | / | CCC |