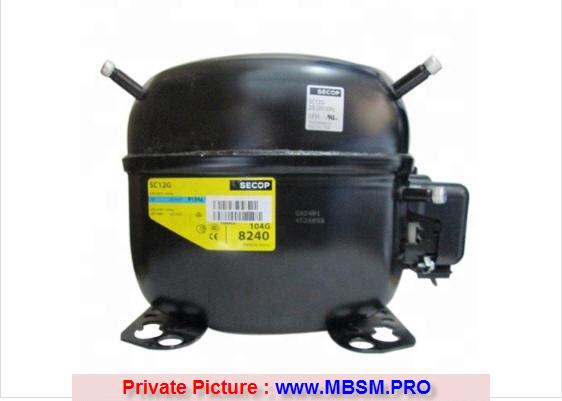
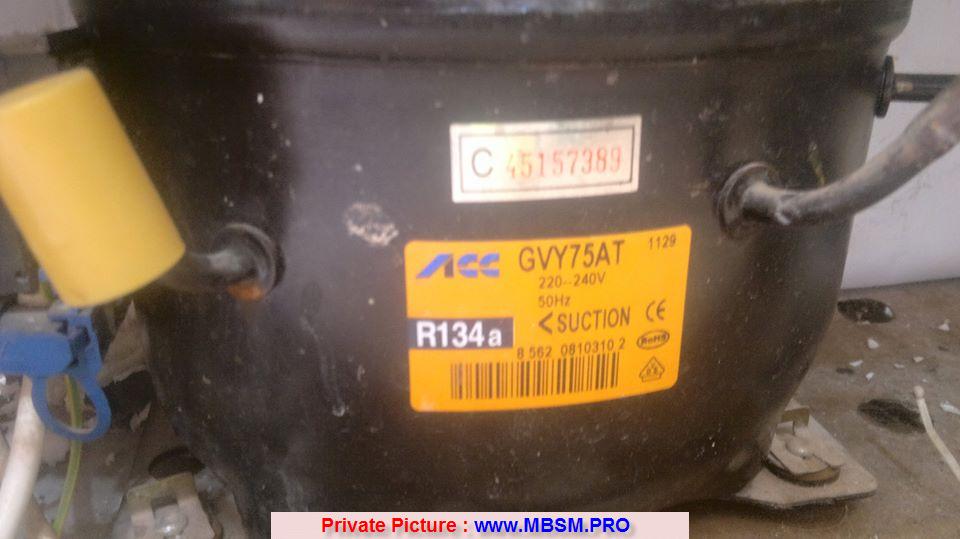
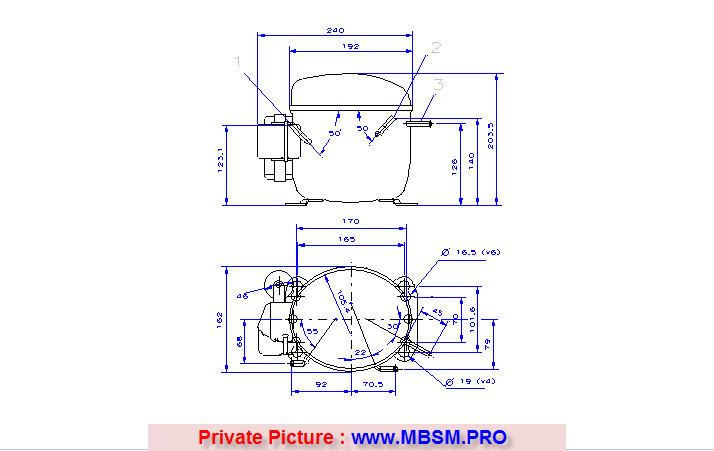
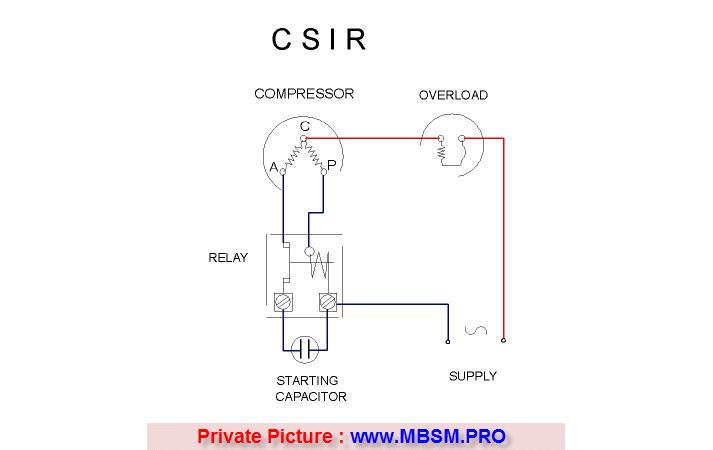
Compresseur, d’entreposage au froid, de congélateur , Sc12g , Secop ,Certification CE ,1/3 puissance ,en chevaux ,de mini type réfrigérateur ,R134 ,Danfos
Category: Technologie,Tester ok
written by www.mbsm.pro | 9 May 2020
Congélateur de secop de SC12G mini compresseur de réfrigérateur de 1/3 puissance en chevaux
appliquez-vous à beaucoup de genres de région haute-basse de la température et êtes employé dans la réfrigération commerciale, climatisation, processus se refroidissant et ainsi de suite. Ils sont admis par l’UL, CSA, ISO9002.
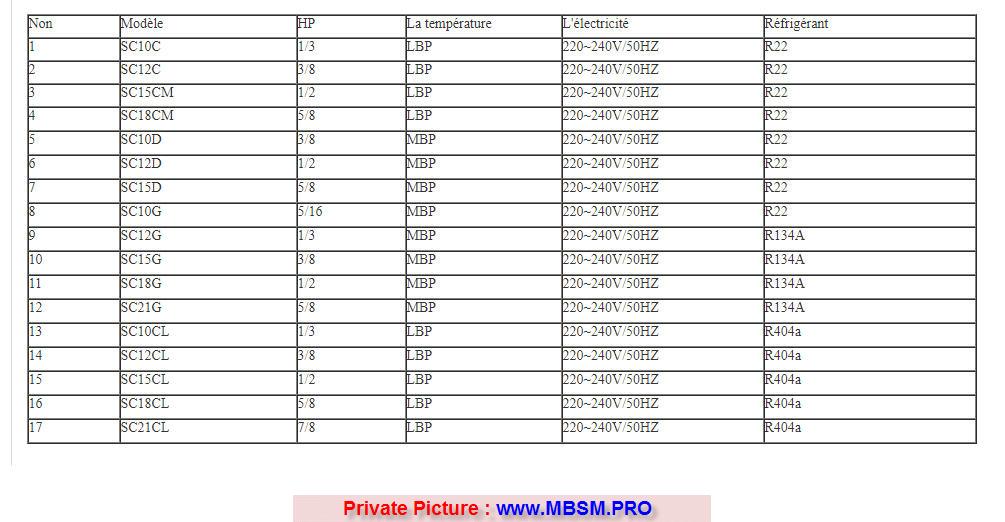
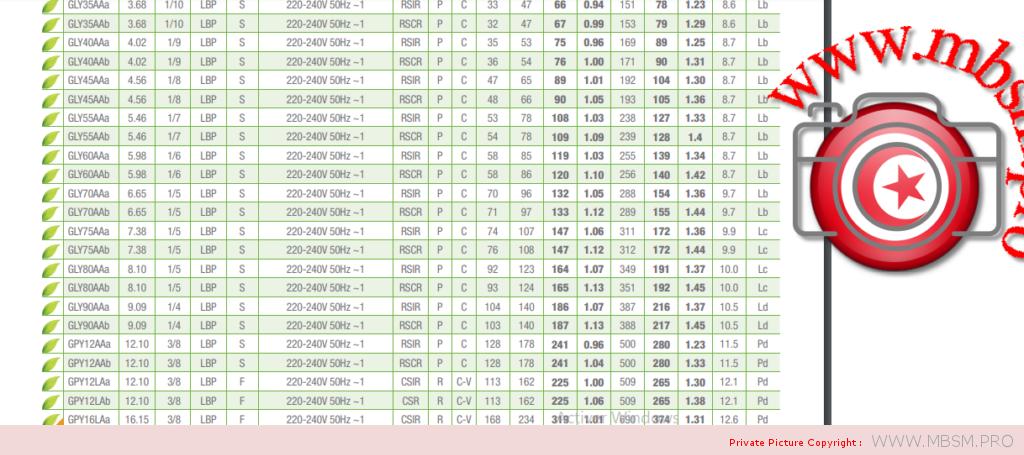
Non
Modèle
HP
La température
L’électricité
Réfrigérant
1
SC10C
1/3
LBP
220~240V/50HZ
R22
2
SC12C
3/8
LBP
220~240V/50HZ
R22
3
SC15CM
1/2
LBP
220~240V/50HZ
R22
4
SC18CM
5/8
LBP
220~240V/50HZ
R22
5
SC10D
3/8
MBP
220~240V/50HZ
R22
6
SC12D
1/2
MBP
220~240V/50HZ
R22
7
SC15D
5/8
MBP
220~240V/50HZ
R22
8
SC10G
5/16
MBP
220~240V/50HZ
R22
9
SC12G
1/3
MBP
220~240V/50HZ
R134A
10
SC15G
3/8
MBP
220~240V/50HZ
R134A
11
SC18G
1/2
MBP
220~240V/50HZ
R134A
12
SC21G
5/8
MBP
220~240V/50HZ
R134A
13
SC10CL
1/3
LBP
220~240V/50HZ
R404a
14
SC12CL
3/8
LBP
220~240V/50HZ
R404a
15
SC15CL
1/2
LBP
220~240V/50HZ
R404a
16
SC18CL
5/8
LBP
220~240V/50HZ
R404a
17
SC21CL
7/8
LBP
220~240V/50HZ
R404a
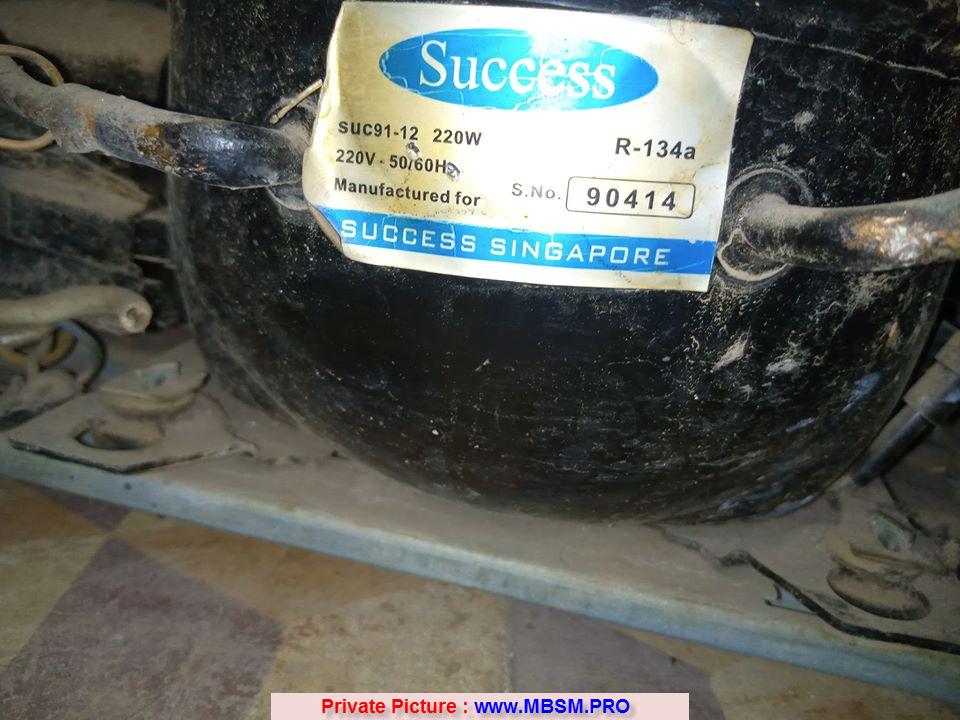
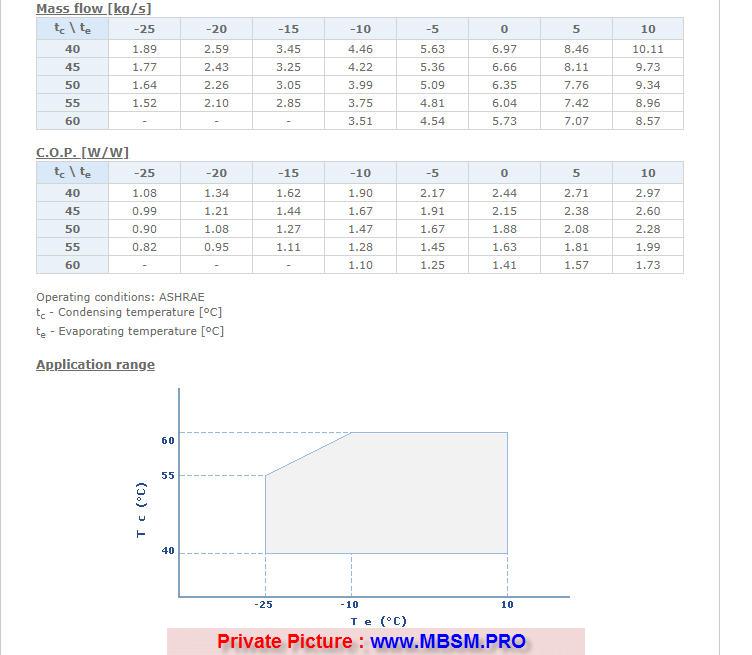
SUC91-12 ,Compresseur ,220 w , 1/4 HP , HBP, or 1/3 HP ,R134a