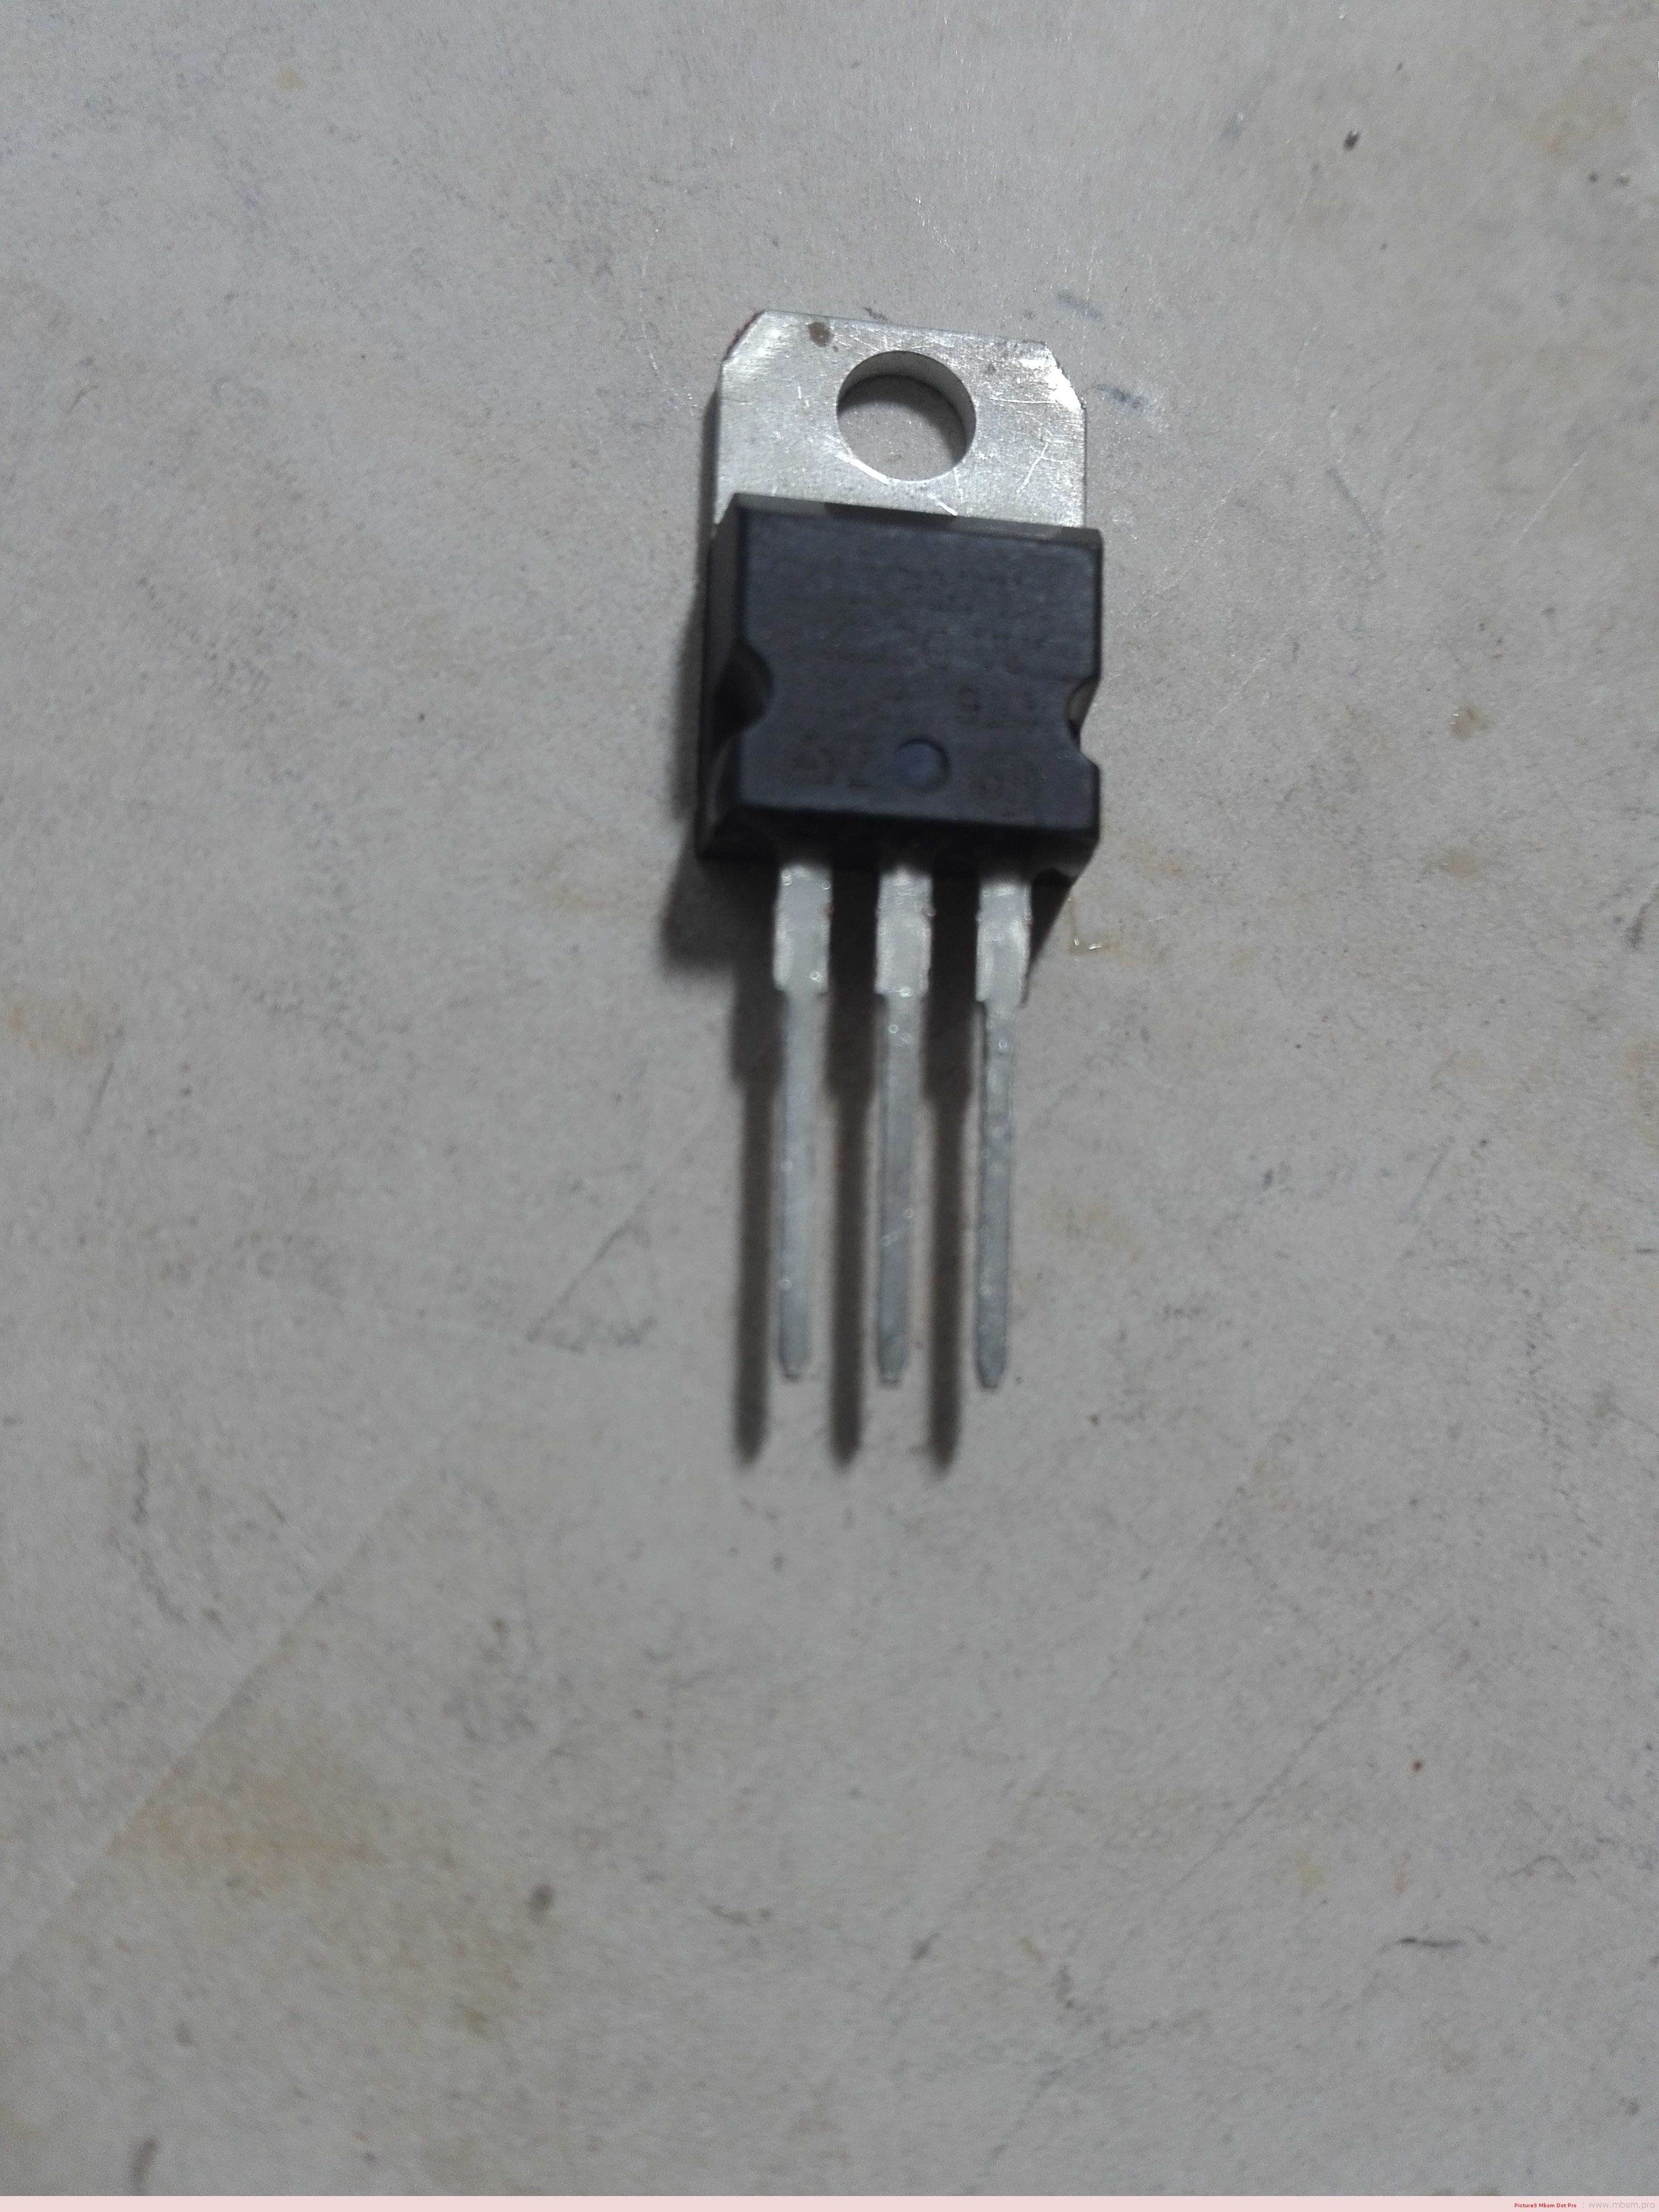
Type Designator: IRF830
Type of Transistor: MOSFET
Type of Control Channel: N -Channel
Maximum Power Dissipation (Pd): 100 W
Maximum Drain-Source Voltage |Vds|: 500 V
Maximum Gate-Source Voltage |Vgs|: 20 V
Maximum Gate-Threshold Voltage |Vgs(th)|: 4 V
Maximum Drain Current |Id|: 4.5 A
Maximum Junction Temperature (Tj): 150 °C
Drain-Source Capacitance (Cd): 800 pF
Maximum Drain-Source On-State Resistance (Rds): 1.5 Ohm
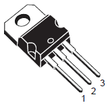
Package: TO220
Use the motor voltage and current specifications (either from the data sheet or from experimentation) to determine which transistors to choose. Selecting transistors with greater capacity will provide a margin of safety in your design.
For the purposes of this tutorial, I am using motors specified at 6V where they draw approximately 130mA. I will choose transistors I happen to have in my parts box. If I didn’t have anything on hand that would work, I would buy something that could handle 2X the voltage and current.
|
|
The IRF830 is an E-Mode N-channel MOSFET rated at 500V with an continuous current rating of 4.5A and a pulsed current rating of 18A. This is more than adequate for these motors.
It also has an internal diode for back-EMF protection. |
|

The
IRF9530 is an E-Mode P-channel MOSFET rated at 100V with a continuous current rating of 7.5A and a pulsed current rating of 48A. It is also more than adequate for my needs.
It also has an internal diode of back-EMF protection.
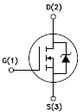
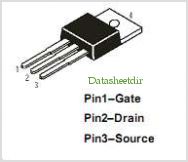
The pin out of the IRF9530 if the same as that of the IRF830 – Gate = pin 1; Drain = pin 2; Source = pin 3 (when viewed from the front.)
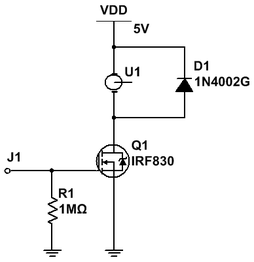
Motor connected from +V to transistor
Always use an N-channel MOSFET when the transistor is directly connected directly to either -V or GND. In this configuration, the transistor’s source pin sinks current from the motor directly back to the power supply. A HIGH on the Gate turns the transistor ON.
D1 is an added external diode to offer the transistor back-EMF protection. It is not required when using a transistor such as the IRF830 because it already has an internal diode for the same purpose. It is shown here simply to show how it should always be connected when using a transistor without an internal diode. It will be omitted from future circuits unless necessary.
R1 is a pull down resistor to ensure a LOW signal to the gate unless it is specifically driven HIGH.
Connections: Drain to motor; Source to GND; Gate to control device.
J1 (the MOSFET gate) is typically connected to a micro-controller pin. A HIGH signal turns the MOSFET ON energizing the motor; a LOW signal turns the MOSFET OFF stopping the motor – LOW = motor OFF; HIGH = motor ON.
The advantage of this circuit is its simplicity; the disadvantage of this circuit is that the motor can only turn in one direction making it suitable for controlling a fan or pump, but, not for a reversible robot.
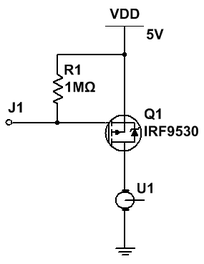
Motor connected from transistor to -V/GND
Always use a P-channel MOSFET when the transistor is directly connected to +V. In this configuration, the transistor’s drain pin channels current to the motor from where it will return to the power supply. A LOW on the Gate turns the transistor ON.
R1 is a pull up resistor to ensure a HIGH signal to the gate unless it is specifically driven LOW.
Connections: Drain to motor; Source to +V; Gate to control device.
J1 (the MOSFET gate) is typically connected to a micro-controller pin. A LOW signal turns the MOSFET ON energizing the motor; a HIGH turns the MOSFET OFF stopping the motor – LOW = motor ON; HIGH = motor OFF.
The advantage of this circuit is its simplicity; the disadvantage of this circuit is that the motor can only turn in one direction making it suitable for controlling a fan or pump, but, not for a reversible robot.
Depending upon desired motor response to specific logic levels, either of these circuits is well suited to function as described above.